Schoology: How to Import Question Bank/Exam Files for Health Titles Copyright 2025

Last updated: Aug 10, 2026
976
views

Both System Administrators and Instructors have the permissions to import question bank/exam files into Schoology once they have activated their subscription.
First, you'll need to download the Question Bank Files from the Online Instructor Resources:
Part 1: Download Question Bank/Exam Files from the Online Instructor Resources
- From within your course, expand the Resources folder and select "Online Instructor Resources".

- The Online Instructor Resources will appear. Scroll down and select the "Assessment Software & Question Pools" section. Note: The Online Instructor Resources will look different than the screen captures below if your copyright edition is prior to 2023.

- Expand the Blackboard Learn 9.x section and select the name of the question type zip folder to download (i.e. Exam Questions, Pretest Questions, Posttest Questions, etc.).

- Once the file is downloaded, extract the files from the ZIP folder.

- After files are extracted, there will be one ZIP folder for each chapter. Do not extract each chapter folder – leave those zipped.

Next, you will import each chapter .zip folder into your Schoology Resources:
Part 2: Upload the Question Bank/Exam Files into Schoology
- Back in Schoology, select the "Resources" tab.

- On the left-hand side of your screen, make sure "Personal" has been selected. Then select the drop-down arrow and select "Import".

- Select "Blackboard (ZIP)", Existing collection (or create a new collection for Question Bank/Exam Files), select the existing collection, create a new folder, and then select the "Next" button.

- Click on Attach File to find and upload the ZIP folder for the Chapter 1 ZIP folder saved from the Online Instructor Resources (OIR). Once the upload is Complete, select "Import".

- A notification will appear showing your files are in the process of being transferred.

- Once the transfer is complete, your question bank files will appear in the dedicated collection.

- Repeat Steps 1-6 until you have all question bank files you would like in your Schoology Resources from all lessons in all modules.
Lastly, you may Create Assessments from your Schoology course:
The exam files have been imported as question bank files. In order to Create Assessments in Schoology, these question bank files must be converted to item bank files first.
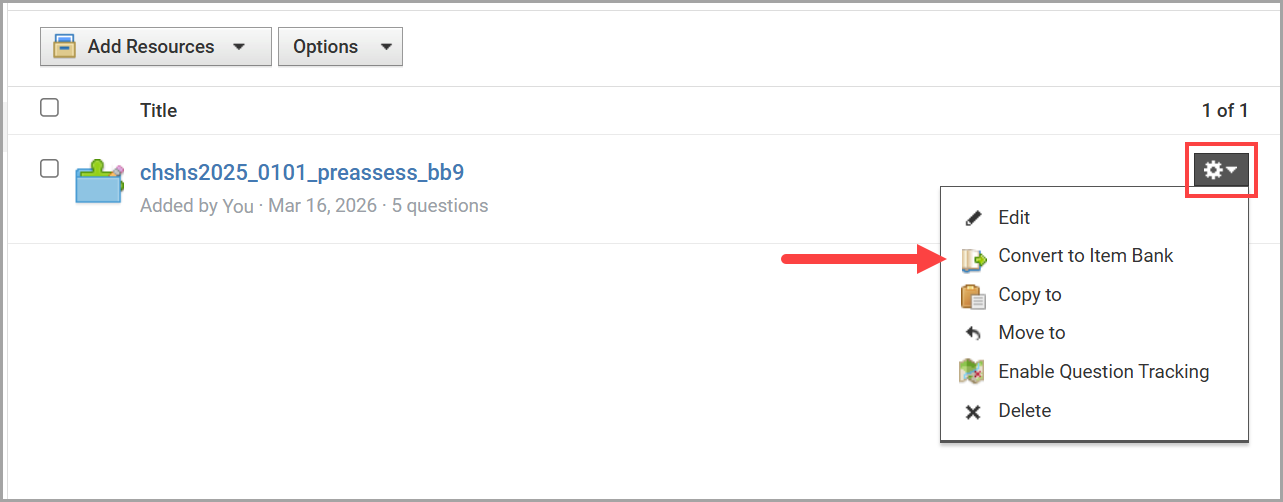
- From your Schoology Resources. Go to the Collection with specific question bank files you'd like to convert. Select the Gear icon to the right of the question bank and select Convert to Item Bank.
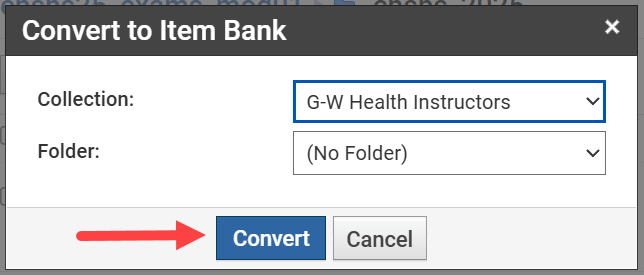
- A dialogue box will appear for you to select which collection and/or folder to add the Item Bank to. Once you have specified, select Convert.
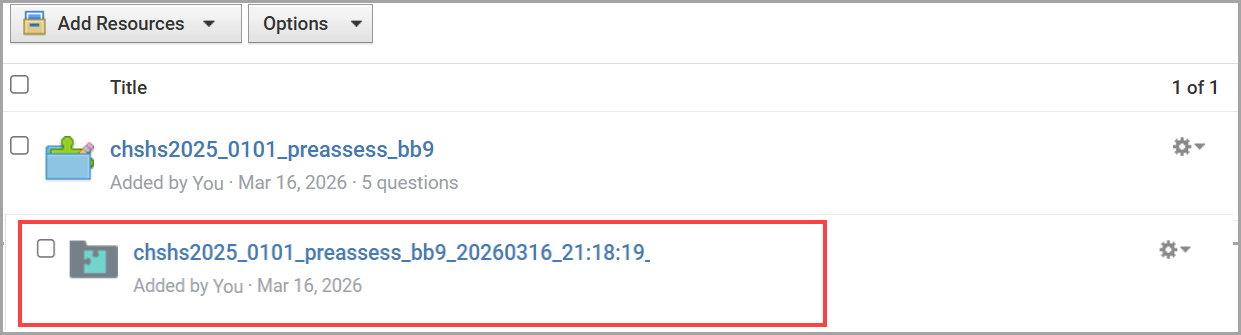
- Once the file has converted, it will have a different icon than the question bank file as you can see below. That icon represents the Item Bank for Assessments in Schoology.
- You may repeat steps 1-3 for all question/item banks with which you'd like to create Assessments.
Now you are ready to Add an Assessment to your health course from Schoology Resources
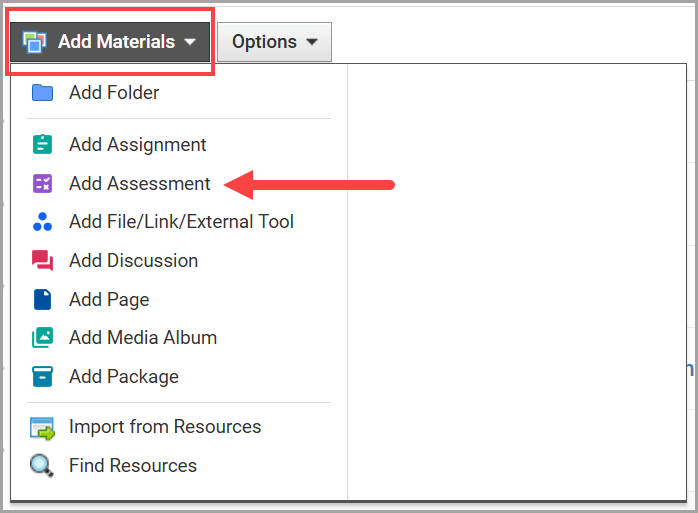
- From your health course, select the Add Materials drop-down menu and select Add Assessment.
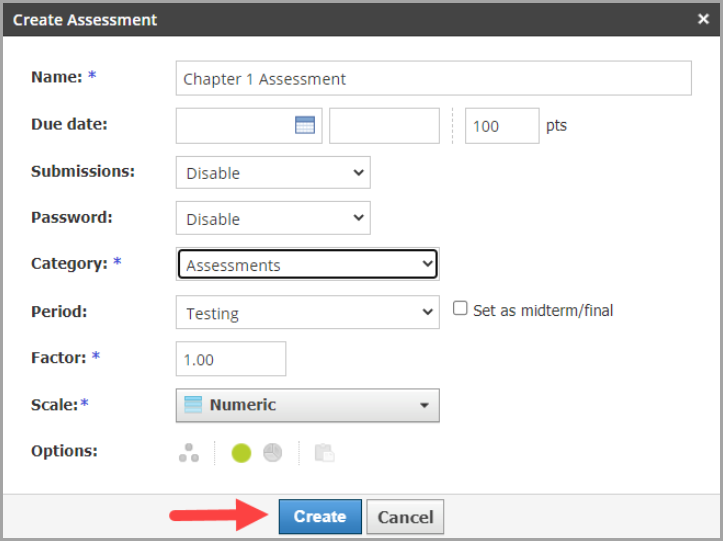
- Enter all required fields from the Create Assessment dialogue box and select the Create button.
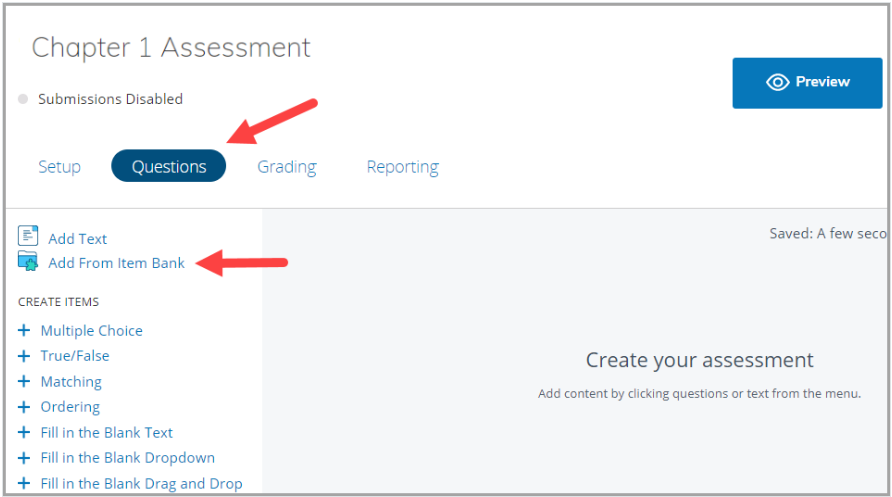
- On the next screen, select Questions and select Add From Item Bank.
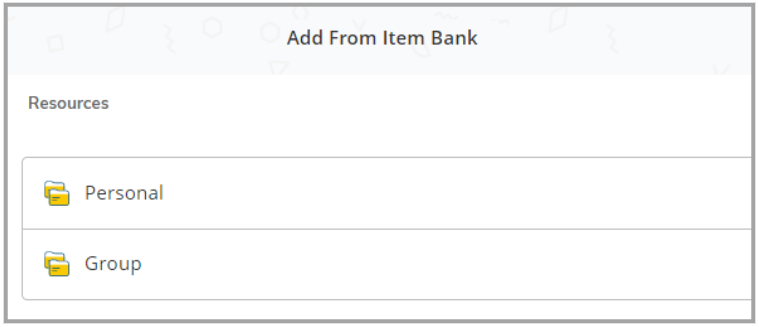
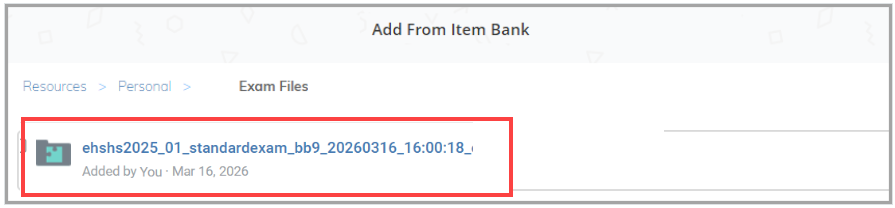
- Depending on the location of the Item Banks, select Personal or Group, and find the specific Item Bank file. In this article we have been working in the Personal Schoology Resources.
- Select the Item Bank file.
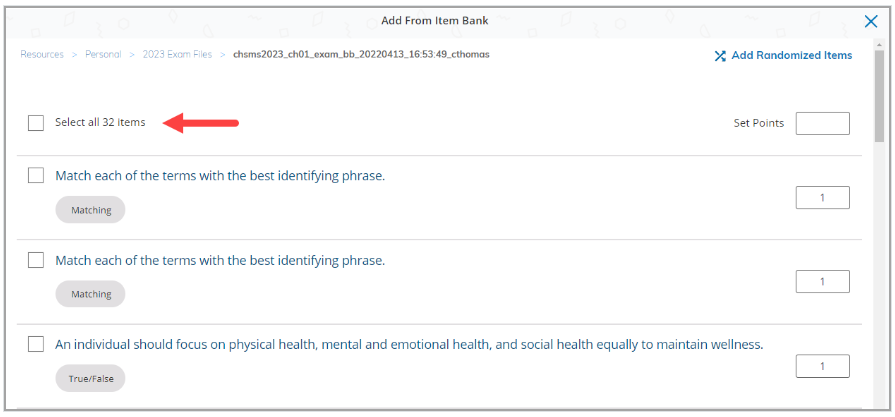
- Select all items in the Item Bank or select specific questions for this particular assessment.
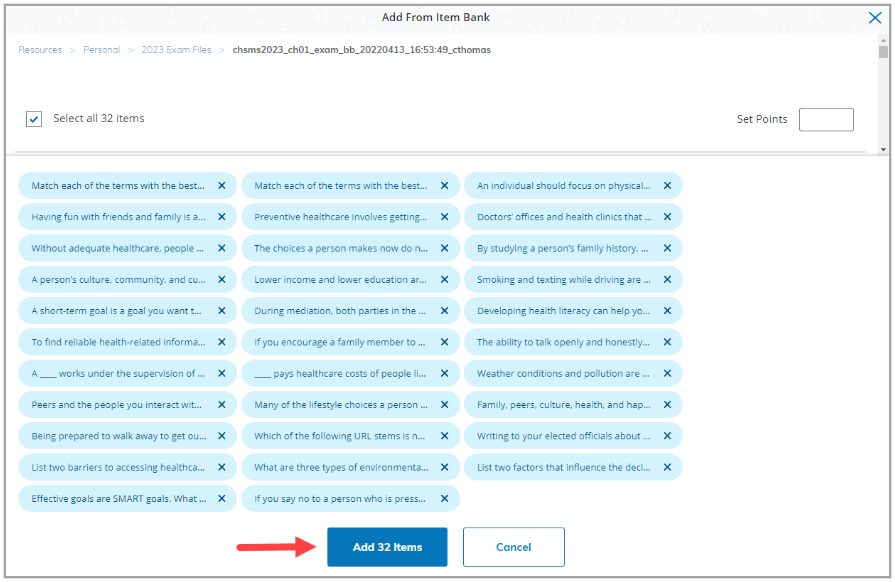
- Confirm the selected items are accurate and select Add Items.
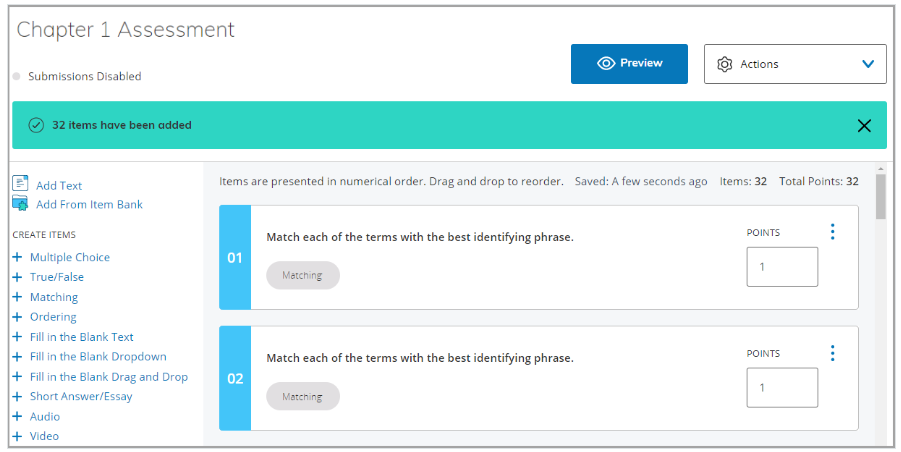
- The assessment has now been created.
- The assessment may be found in your health course near the bottom of all resources in the course.
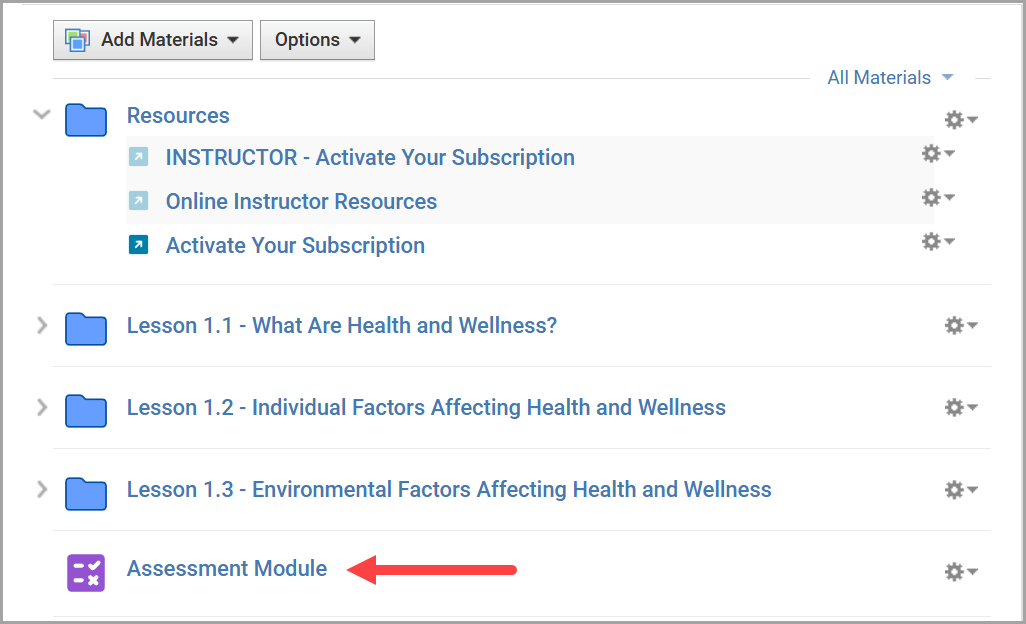
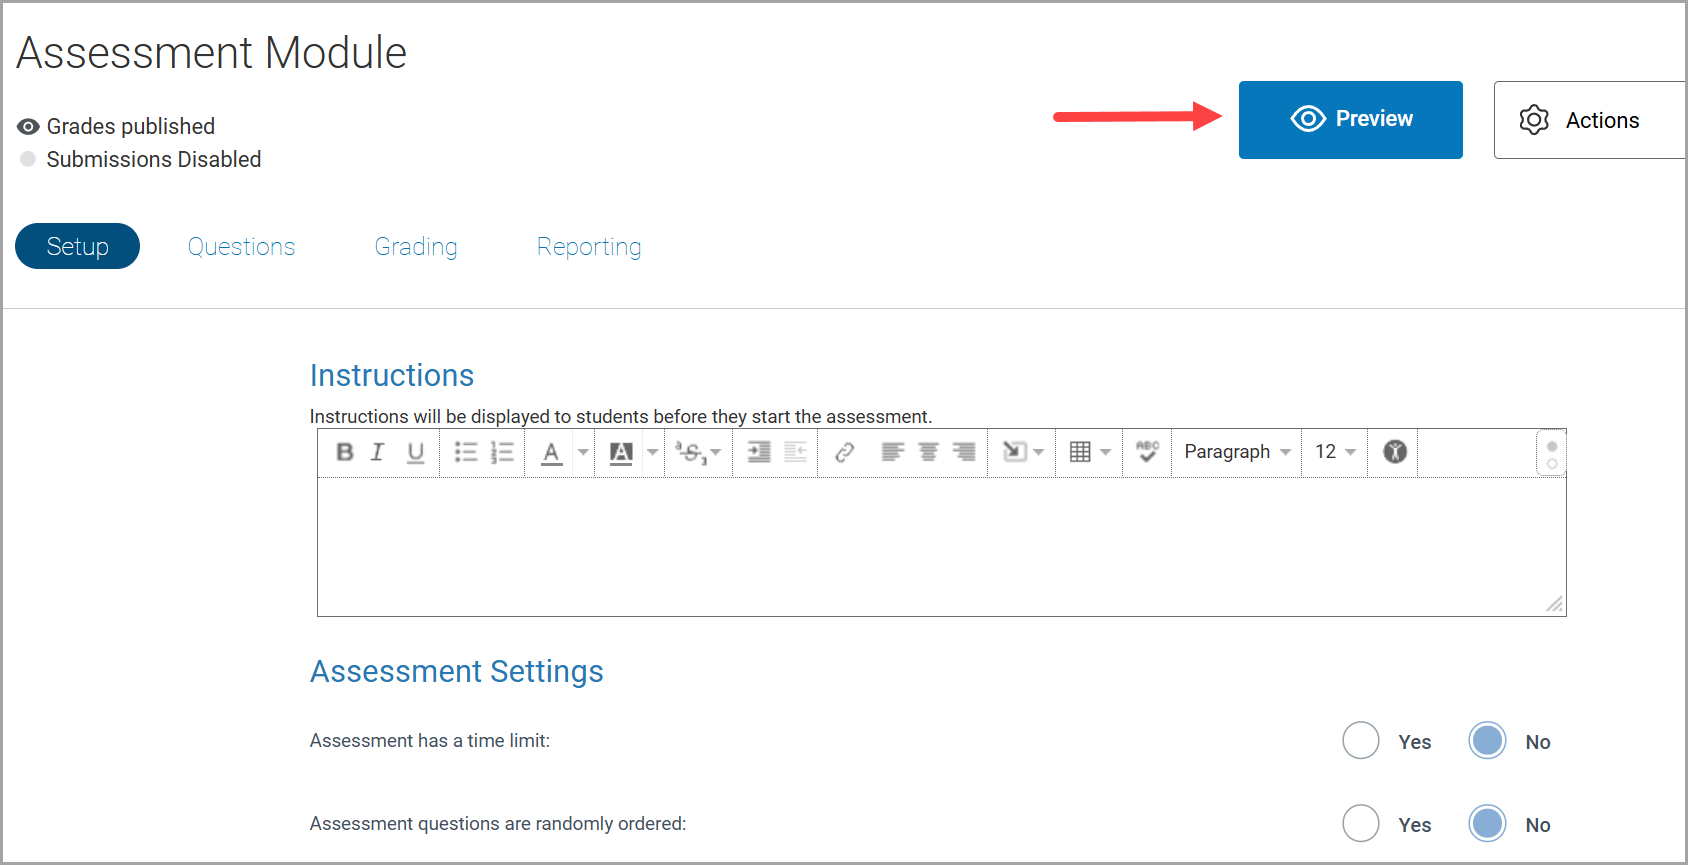
- Instructors may select the assessment and add instructions or any other settings found in Schoology. They may also select Preview to view the assessment as a student.